XSLT Studio — User Guide (v1.0.17)
XSLT Studio is a web application for designing e-Invoice / e-Archive view templates (XSLT) without writing code, checking them for Logo ERP compatibility and keeping them versioned.
1) Sign-in and first password
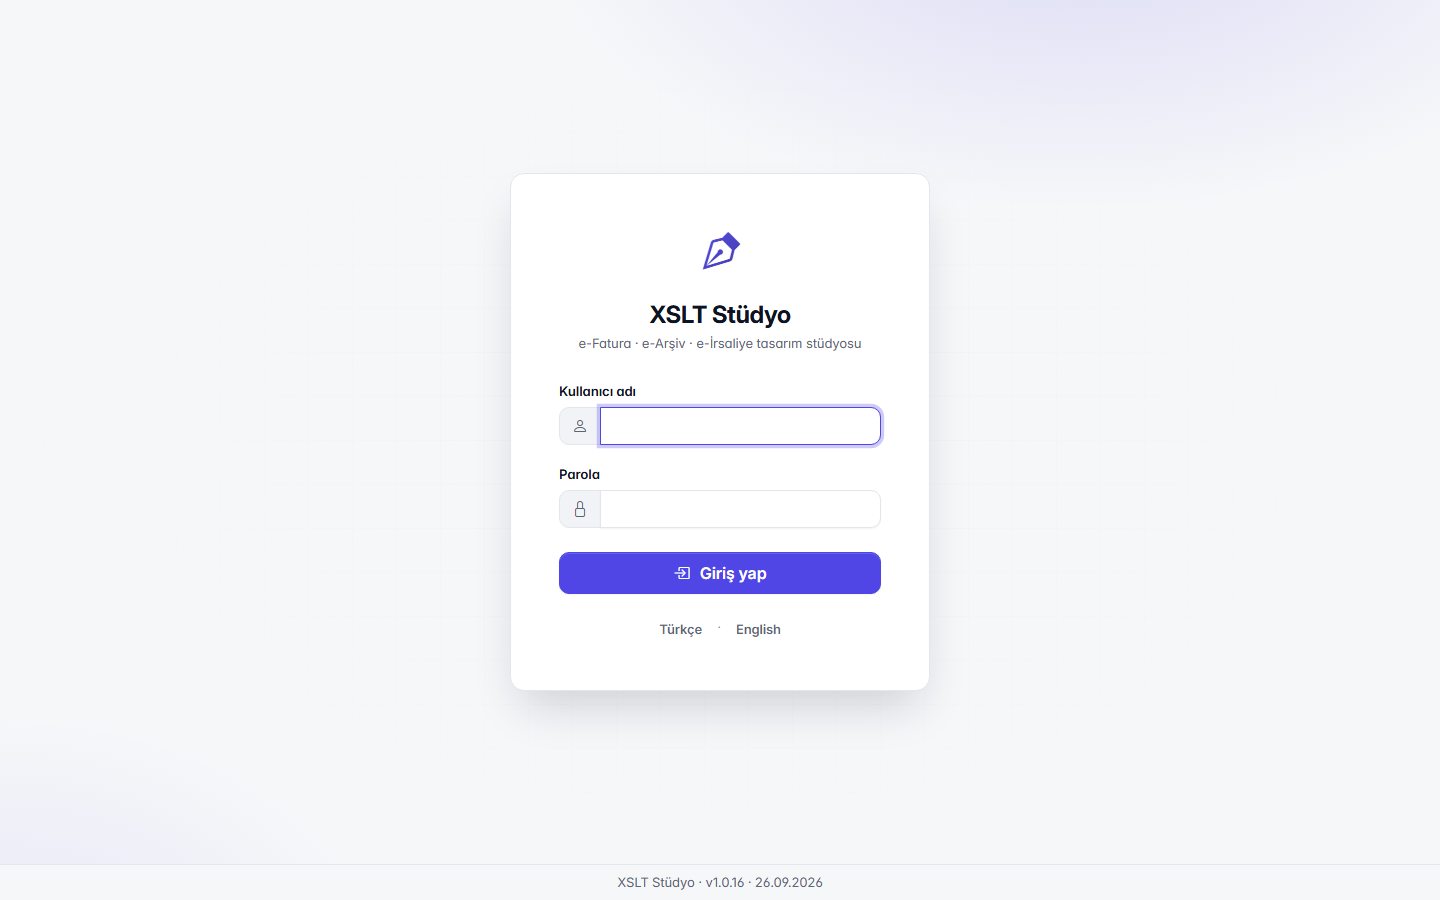
- On first installation the temporary password of the
adminaccount is written toadmin-parola.txtin the data folder on the server; a password change is required on first sign-in and the file is deleted afterwards. - Accounts created or reset by an administrator also set a new password on first sign-in.
- When demo is enabled, Demo · Admin and Demo · Standard quick sign-in buttons appear under the card; demo is disabled on an installation, these buttons are not shown.
- On a given machine, demo works for 24 hours from the first demo sign-in (
Demo:SureSaat); afterwards the sign-in page shows a "demo period expired" warning. XSLT/UBL/ZIP files downloaded with a demo account are watermarked: "ERP XSLT STUDIO DEMO - LISANSSIZ KOPYA" and a per-download trace code appear across the output; a licensed account is required for clean output. - Language (TR/EN) and theme (light/dark) can be chosen at the top right.
2) Design list
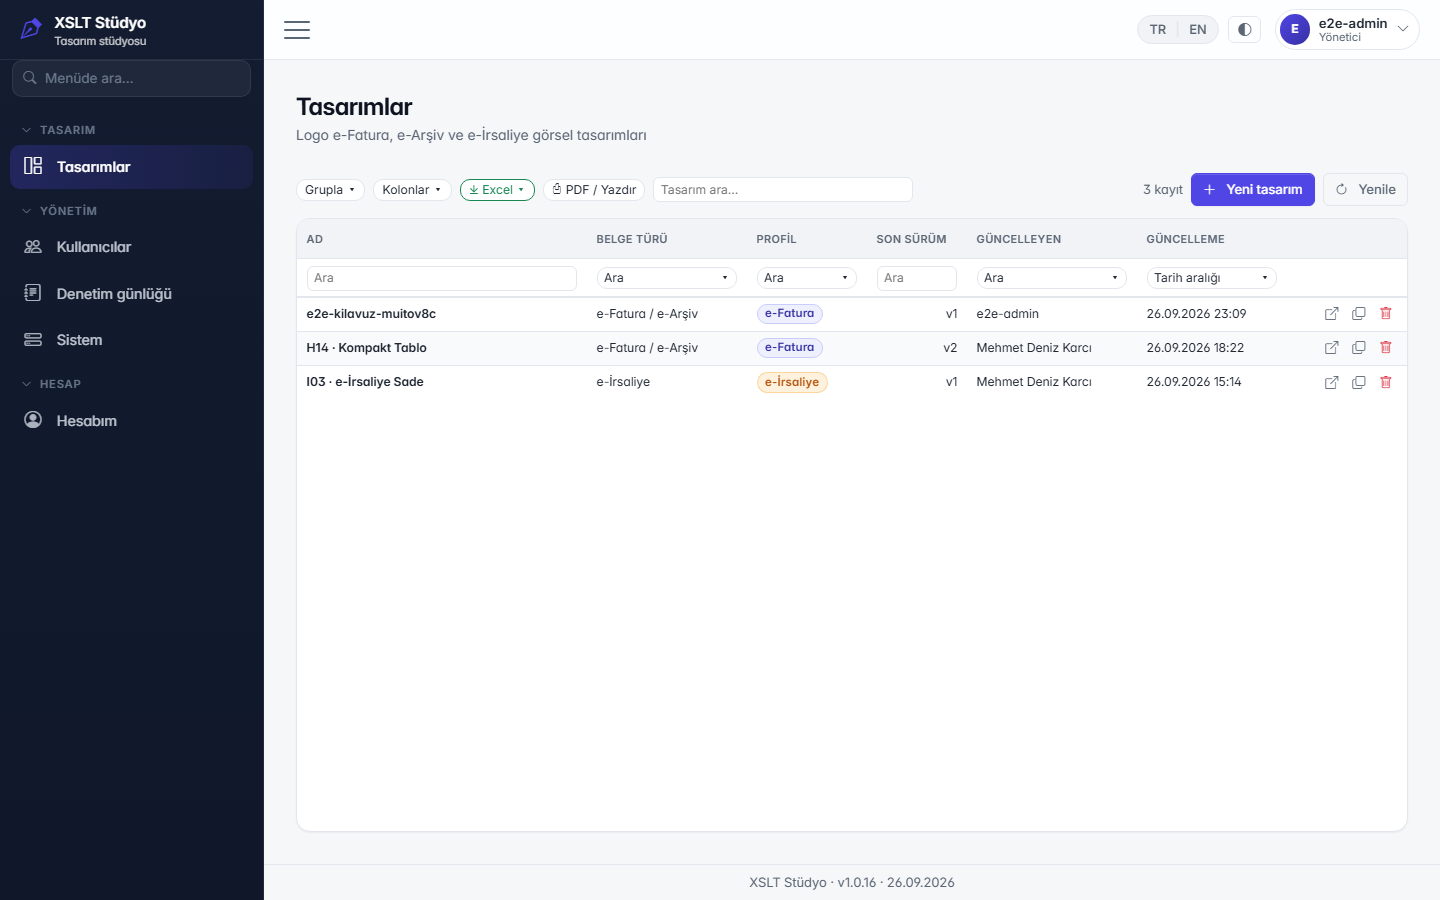
- The list is a kmpGrid: search box, grouping by dragging a column header, multi-column sorting, column show/hide and width (remembered in the browser), Excel and PDF/print export.
- The document type filter and date range chips (Today · This week · This month · This year · All) filter on the server.
- Row actions: Open (studio), Copy (copy under a new name), Delete (with confirmation; the design leaves the list, its history is kept).
3) New design wizard
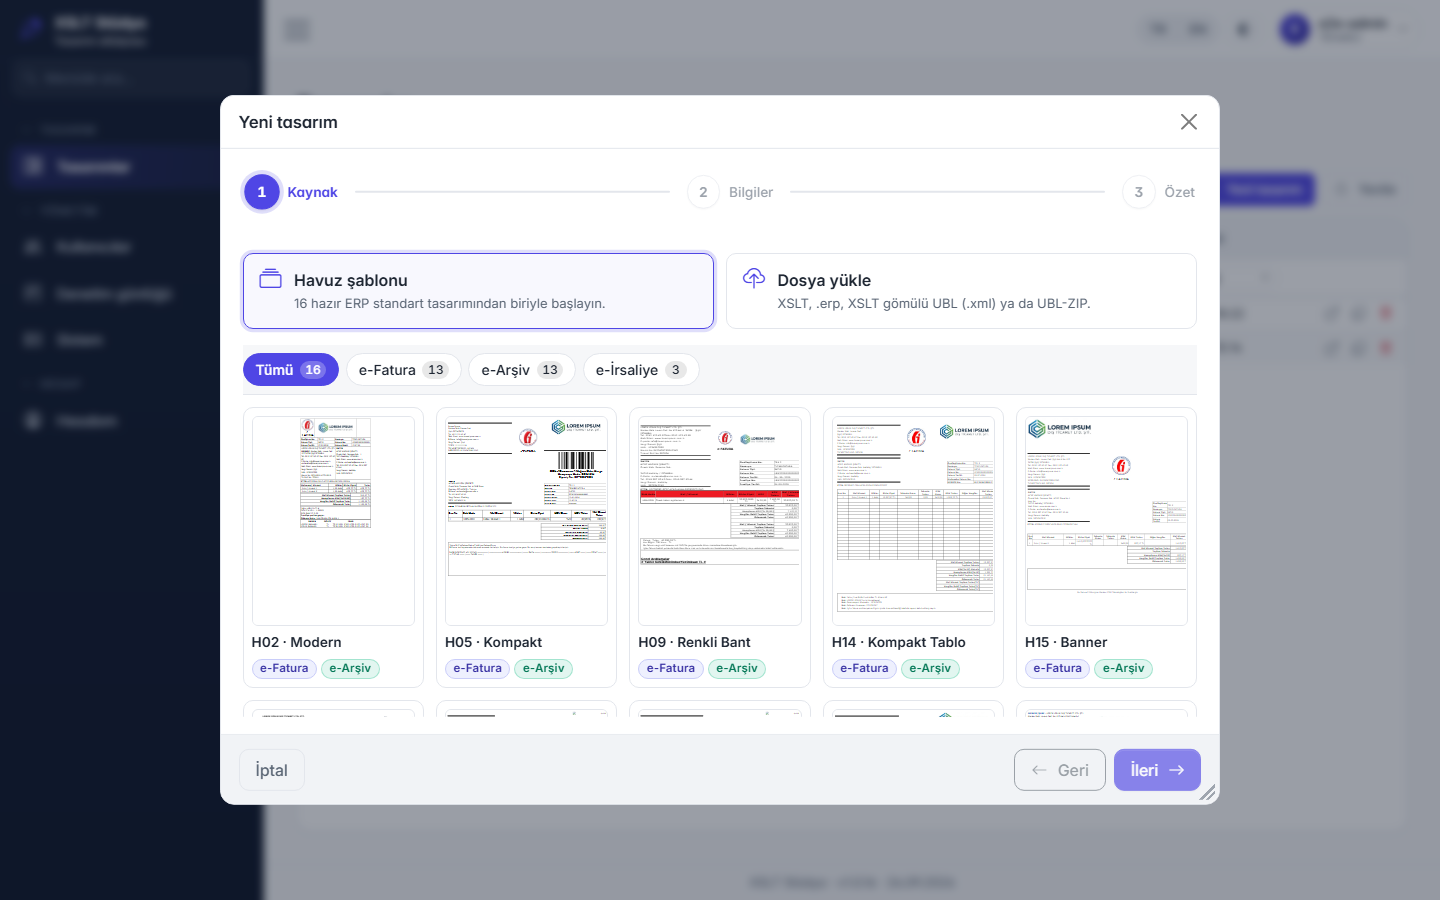
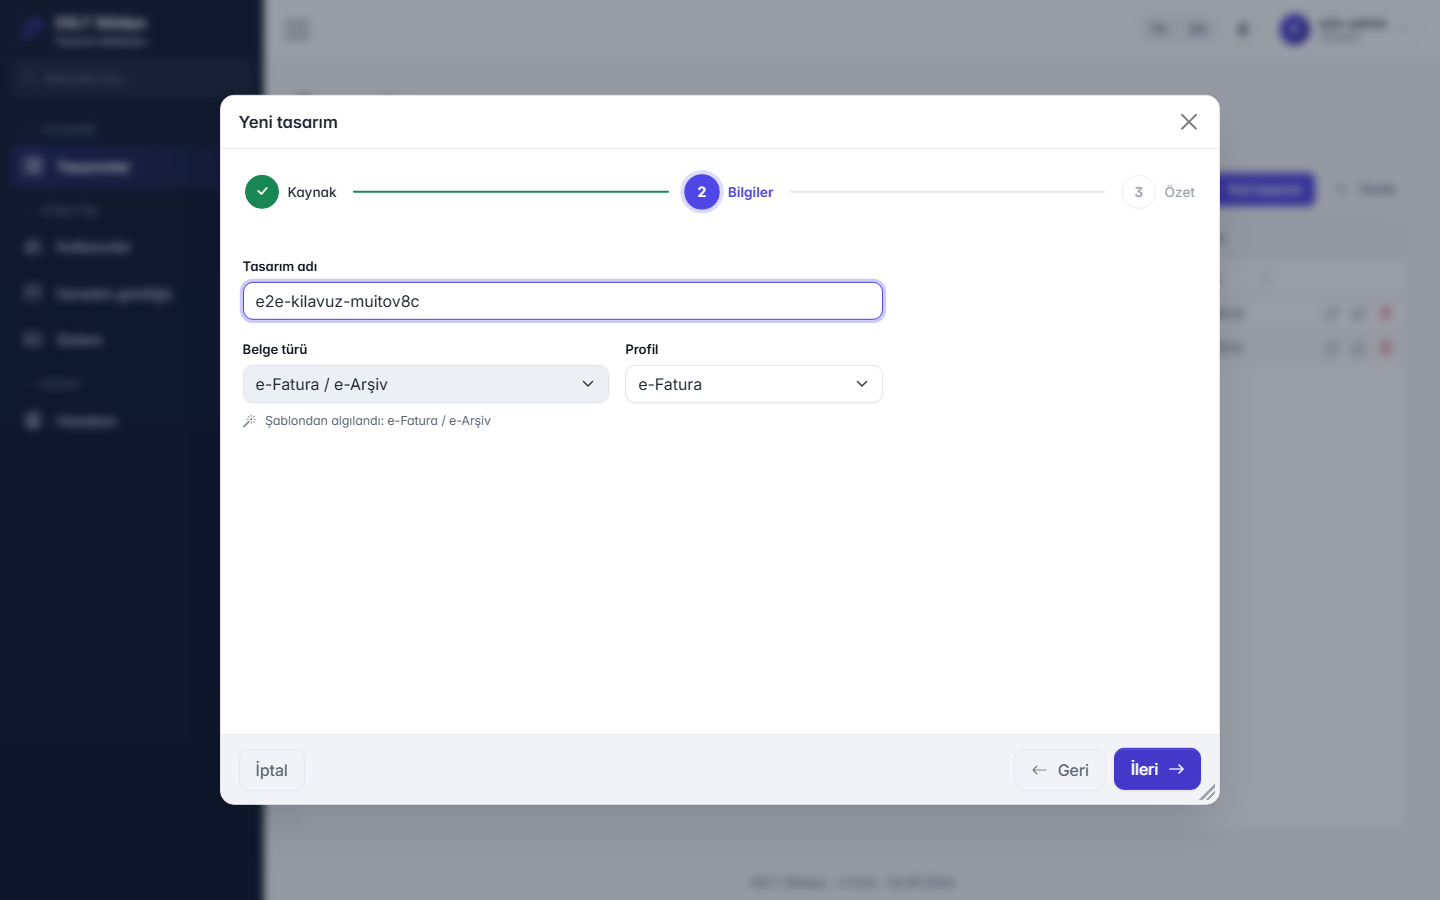
Three steps: Source → Details → Summary.
- Pool template: one of the ready-made ERP standard designs (with e-Invoice / e-Archive badges).
- Upload file: XSLT,
.erppackage, UBL with embedded XSLT (.xml) or UBL-ZIP. The upload limit is 12 MB. - Enter the name and document type in Details; Create in Summary saves the design as v1 and opens the studio.
4) Studio layout
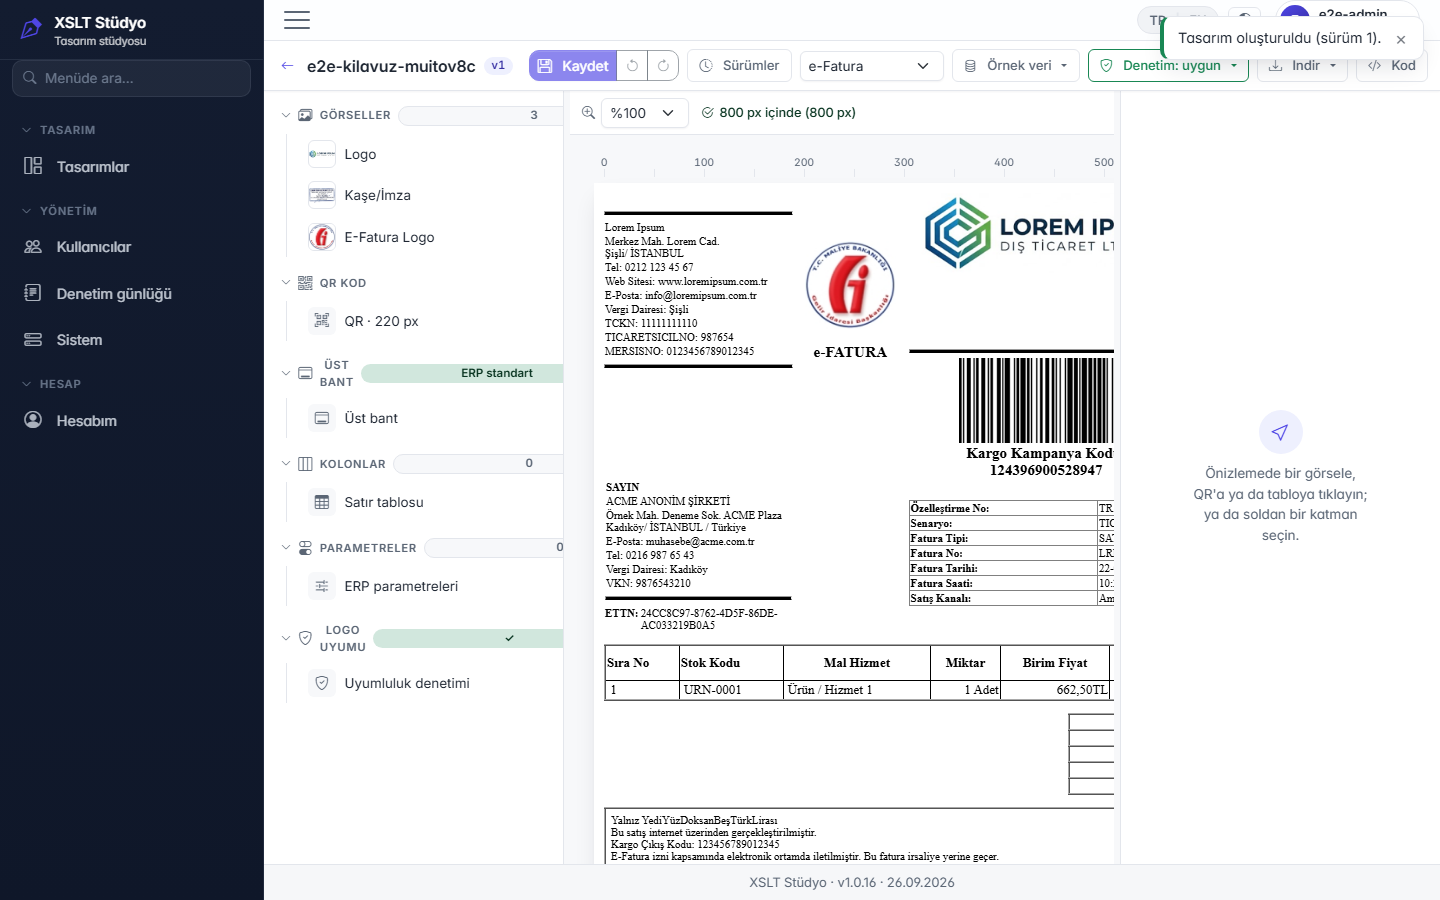
- Command bar: back, design name + version badge (
v1 •when there are unsaved changes), Save, Undo / Redo, Versions, document type, Sample data, Check badge, Download, Code. - Left — layers: Images, QR code, Header band, Columns, Parameters, Logo compatibility.
- Centre — canvas: zoom, ruler, 800 px boundary line and overflow warning (“within 800 px”).
- Right — properties: settings of the selected element. The splitters between panes can be dragged.
- Shortcuts:
Ctrl+Ssave,Ctrl+Zundo,Ctrl+Yredo.
5) Image, QR, header band, column and parameter edits
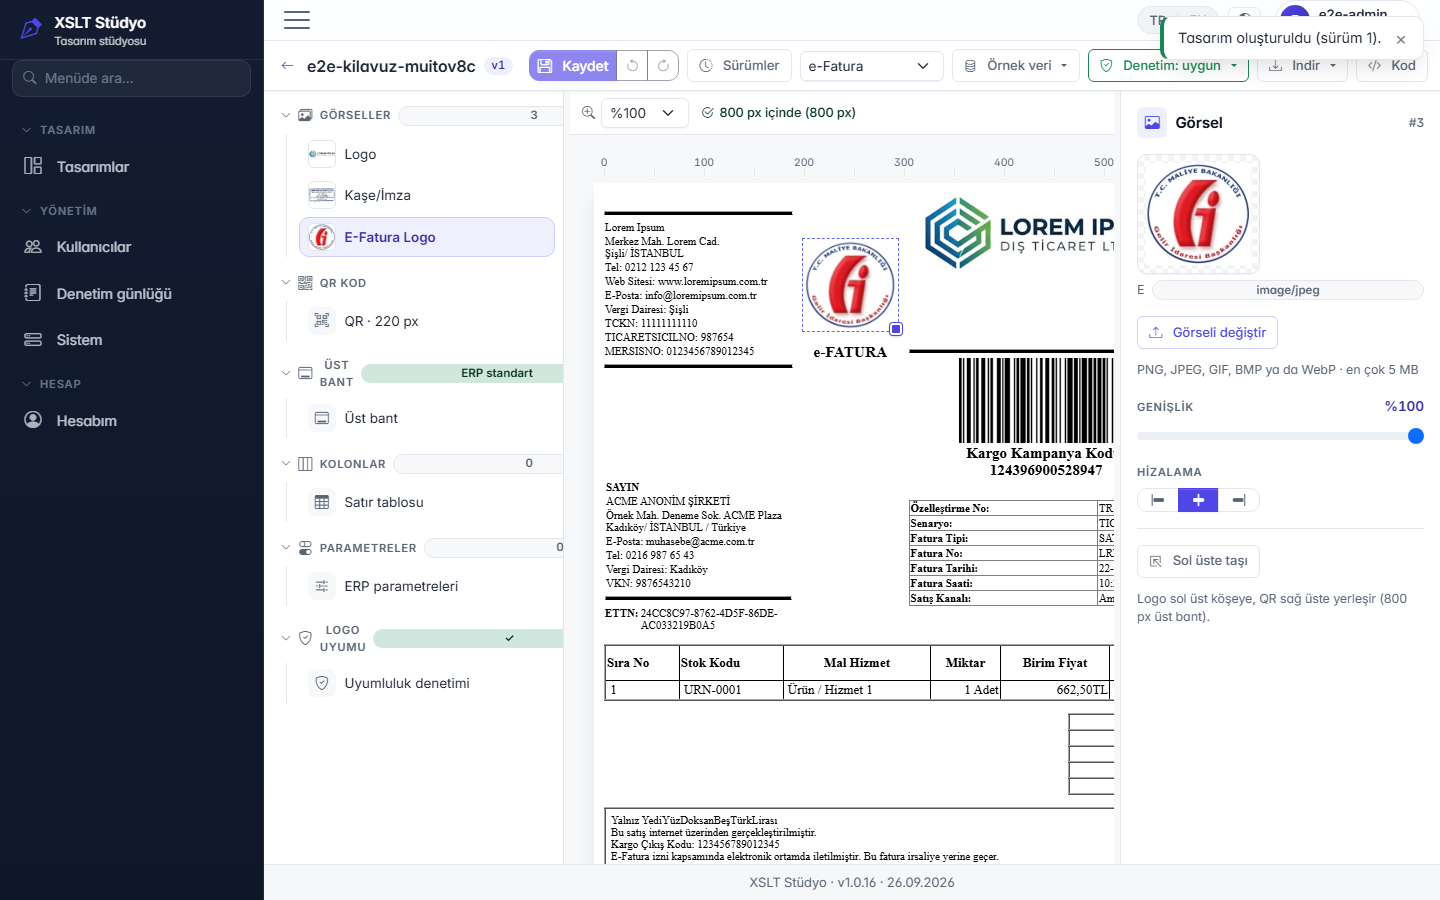
- Click an image, the QR code, a table or a text in the preview, or pick a layer on the left; the right pane opens.
- Image: replace the image (PNG, JPEG, GIF, BMP, WebP; up to 5 MB), width (%), alignment (left/centre/right), “Move to top left”.
- QR code: size and position. Header band: ERP standard header layout.
- Columns: visibility and order of the line table columns. Parameters: ERP parameters.
6) Drag & drop and resizing on the canvas
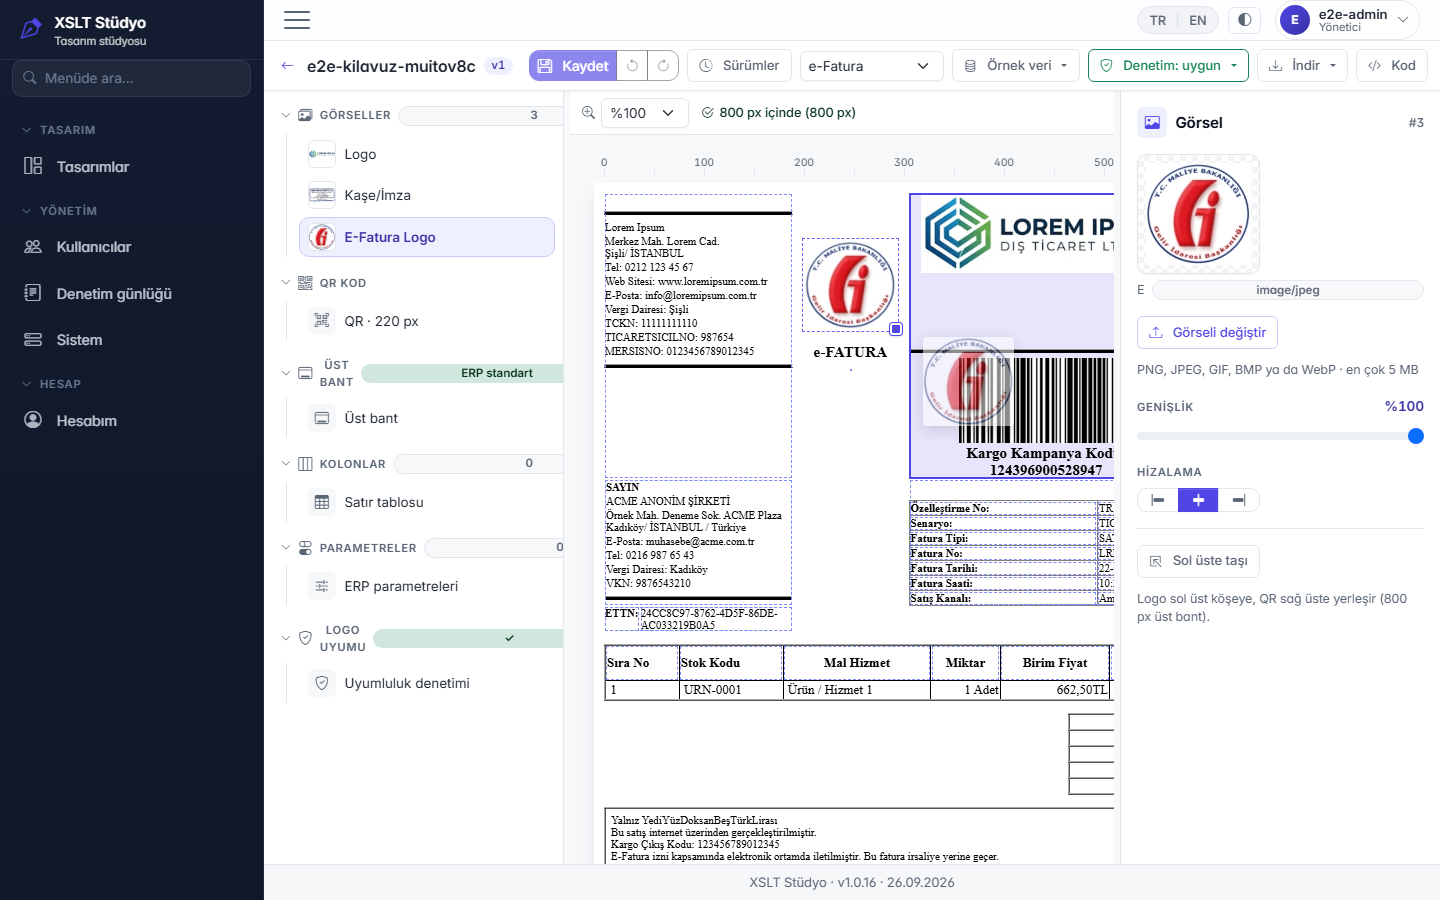
- Resize: drag the handle at the bottom-right corner of the selected image or QR code; a live size label is shown. Images take 5%–100% of the cell width, the QR code 20–1000 px.
- Move: grab the selected image, logo, stamp/signature, QR code or a text block and drag it. Cells that accept the drop get a dashed outline and the hovered target a solid frame; the element moves to the start of the target cell.
- Only cells in the same loop scope can be targets (e.g. a value inside an invoice line cannot be moved out of
the line table). A single condition (
xsl:if) wrapping the element moves together with it. - Every move and resize is an undoable change (
Ctrl+Z); if the preview is stale the operation is rejected and the canvas refreshes.
7) Text fields, UBL field selection and conditions
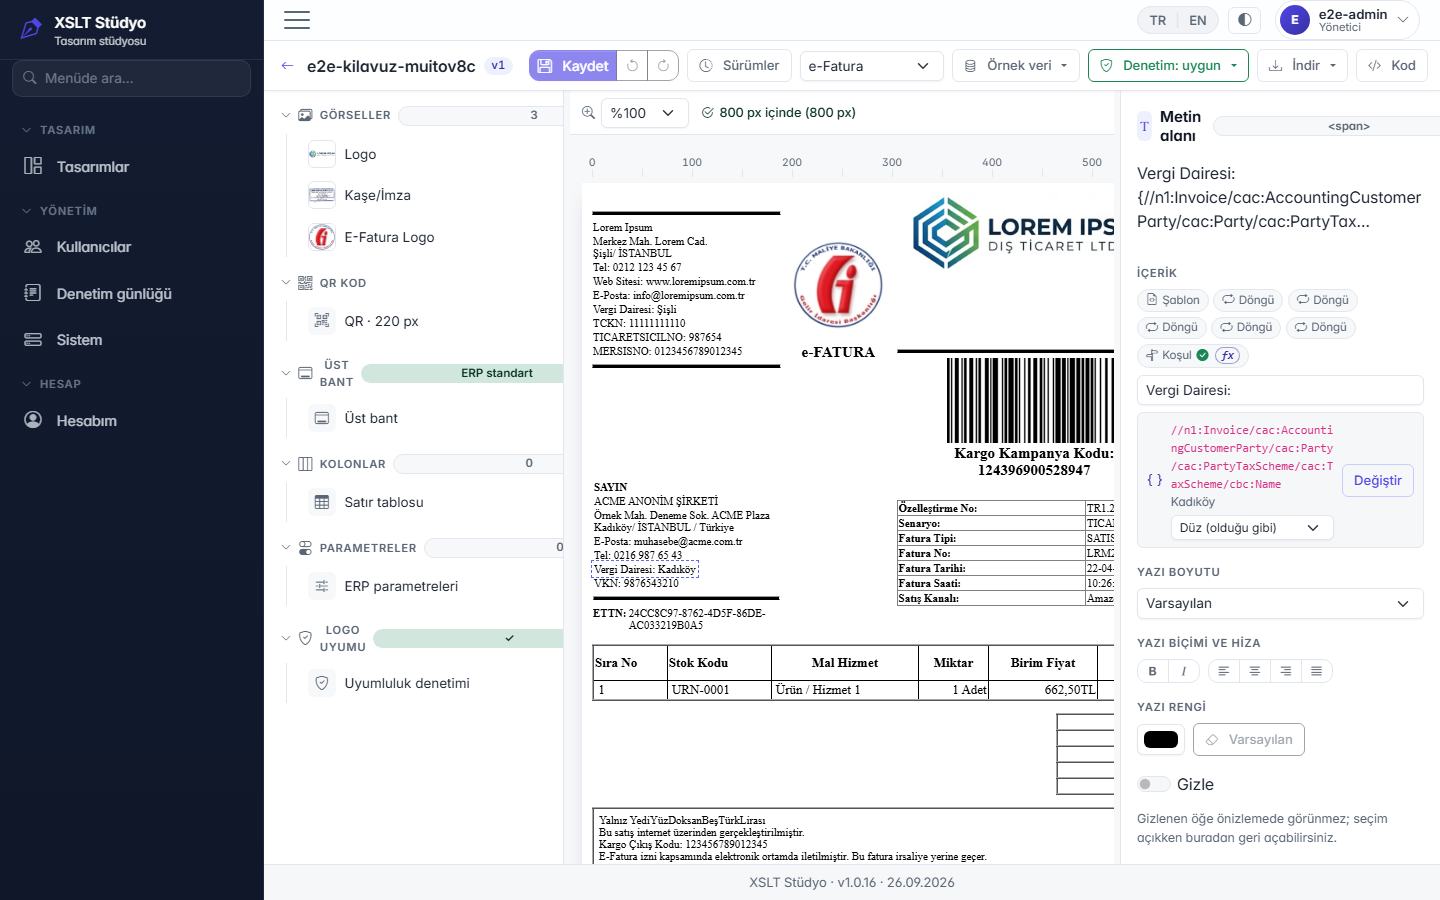
Clicking a text on the canvas opens the Text field pane on the right:
- Content: chips showing which template, loops and conditions the text sits in.
- Literal text (e.g. the “Tax Office:” caption) can be edited directly.
- UBL value: the path the value comes from and its value in the sample invoice; Change picks another UBL
field and the format list sets how it is displayed: plain, currency (
1.234,56), decimal, integer, date (dd.mm.yyyy) or a custom expression. - Font size, bold/italic, alignment and colour; Hide removes the element from the preview (it can be shown again from the pane).
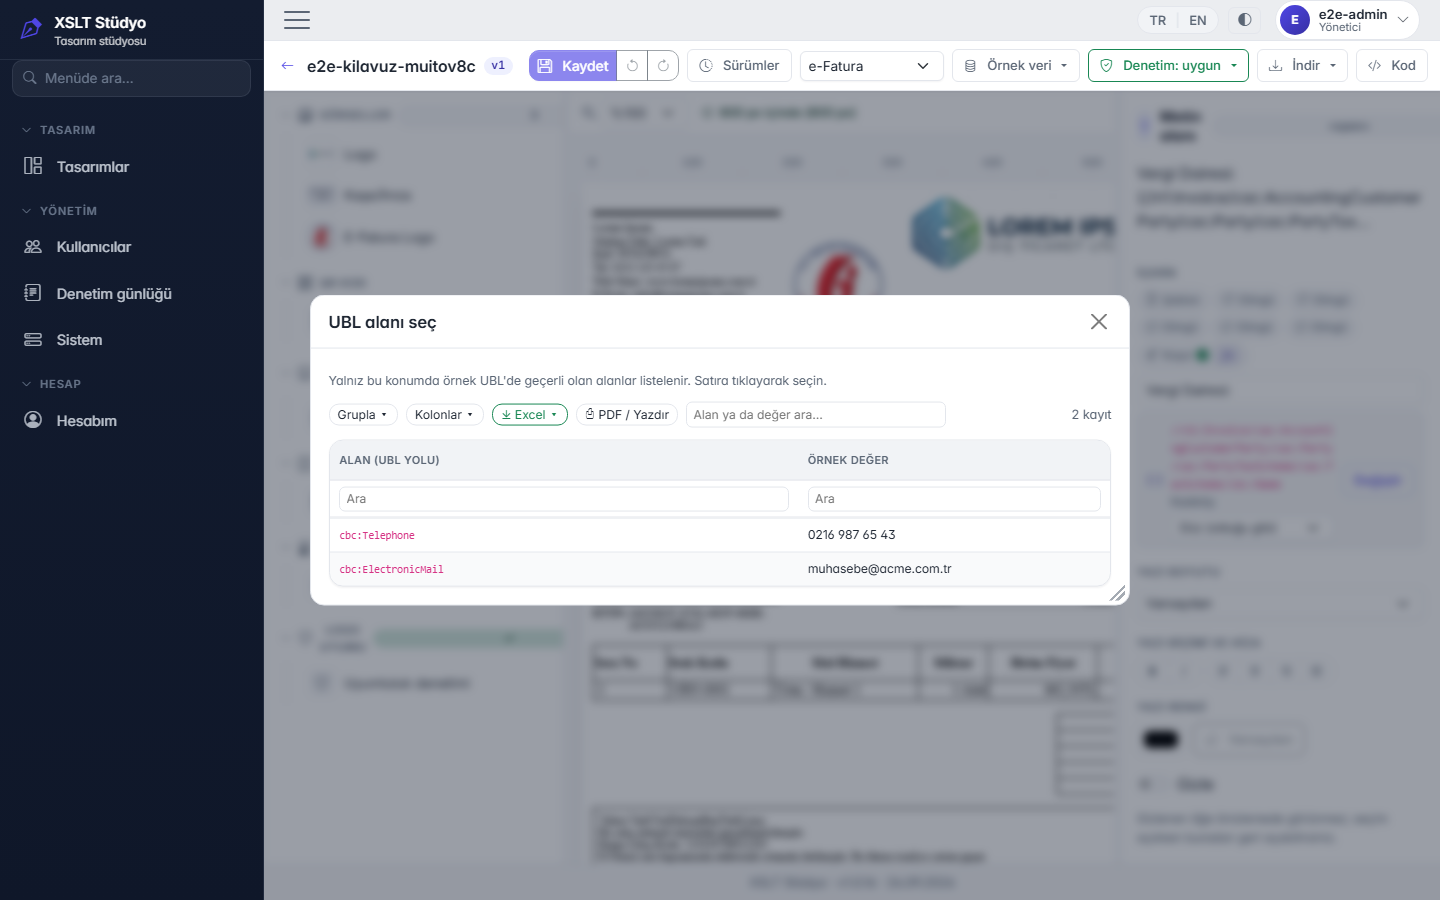
The Select UBL field dialog lists only the fields that are valid at this position in the sample UBL; search, group and click a row to select it.
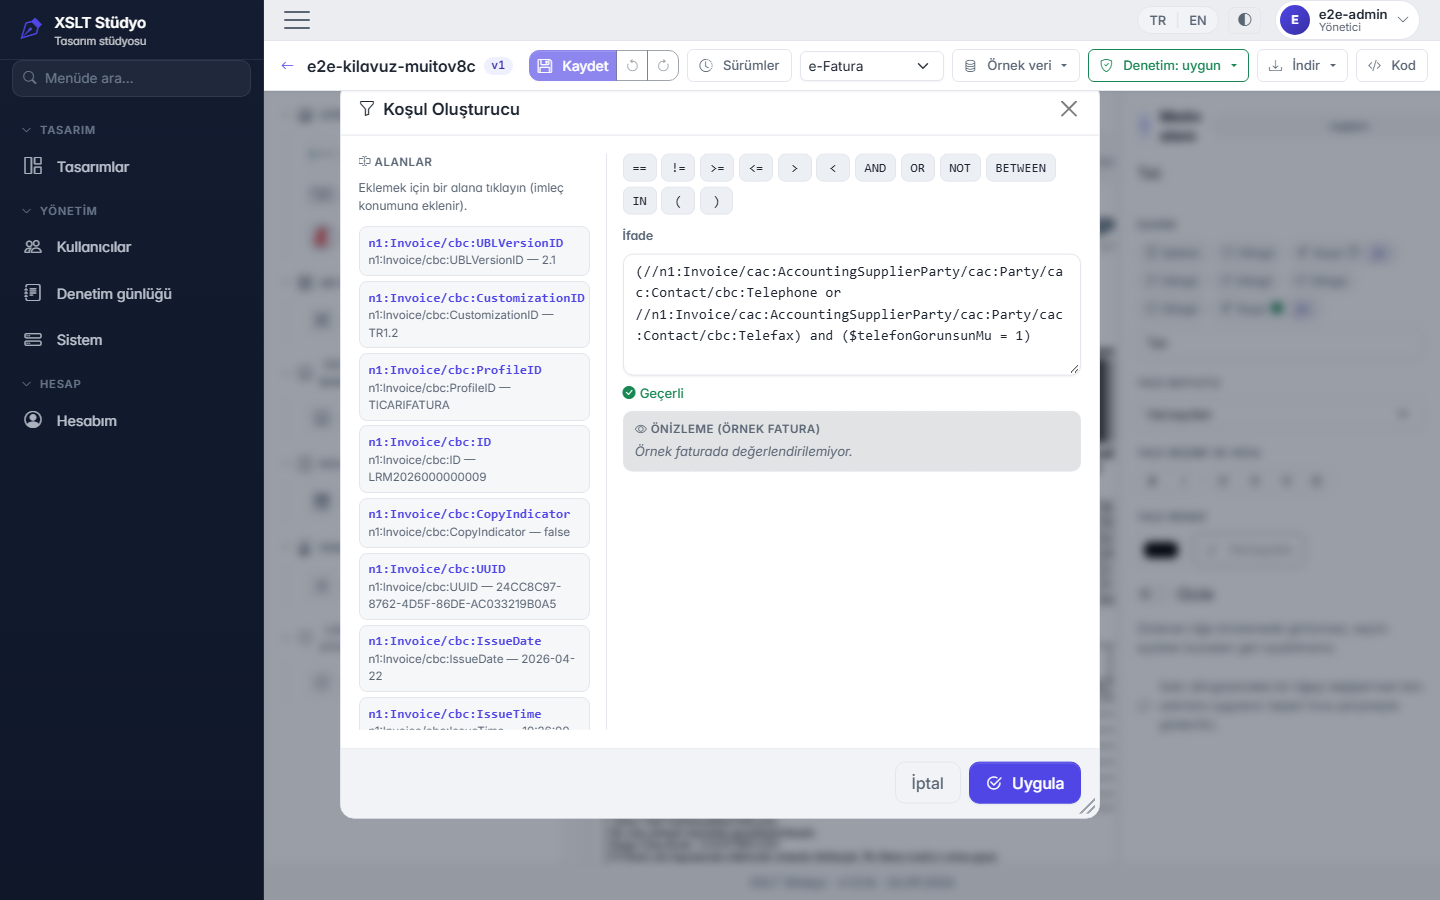
The fx button next to a condition opens the Condition Builder: add fields from the left, type operators
(== != >= <= > < AND OR NOT BETWEEN IN) with the buttons; the expression is validated instantly and previewed
against the sample invoice. Apply writes the condition into the design.
8) Logo compatibility and automatic fixes
The Logo compatibility layer on the left shows whether the design matches the structure Logo ERP expects. If not, automatic fixes are applied with one click from the Compatibility check list; a fix is also an undoable change.
9) Check badge
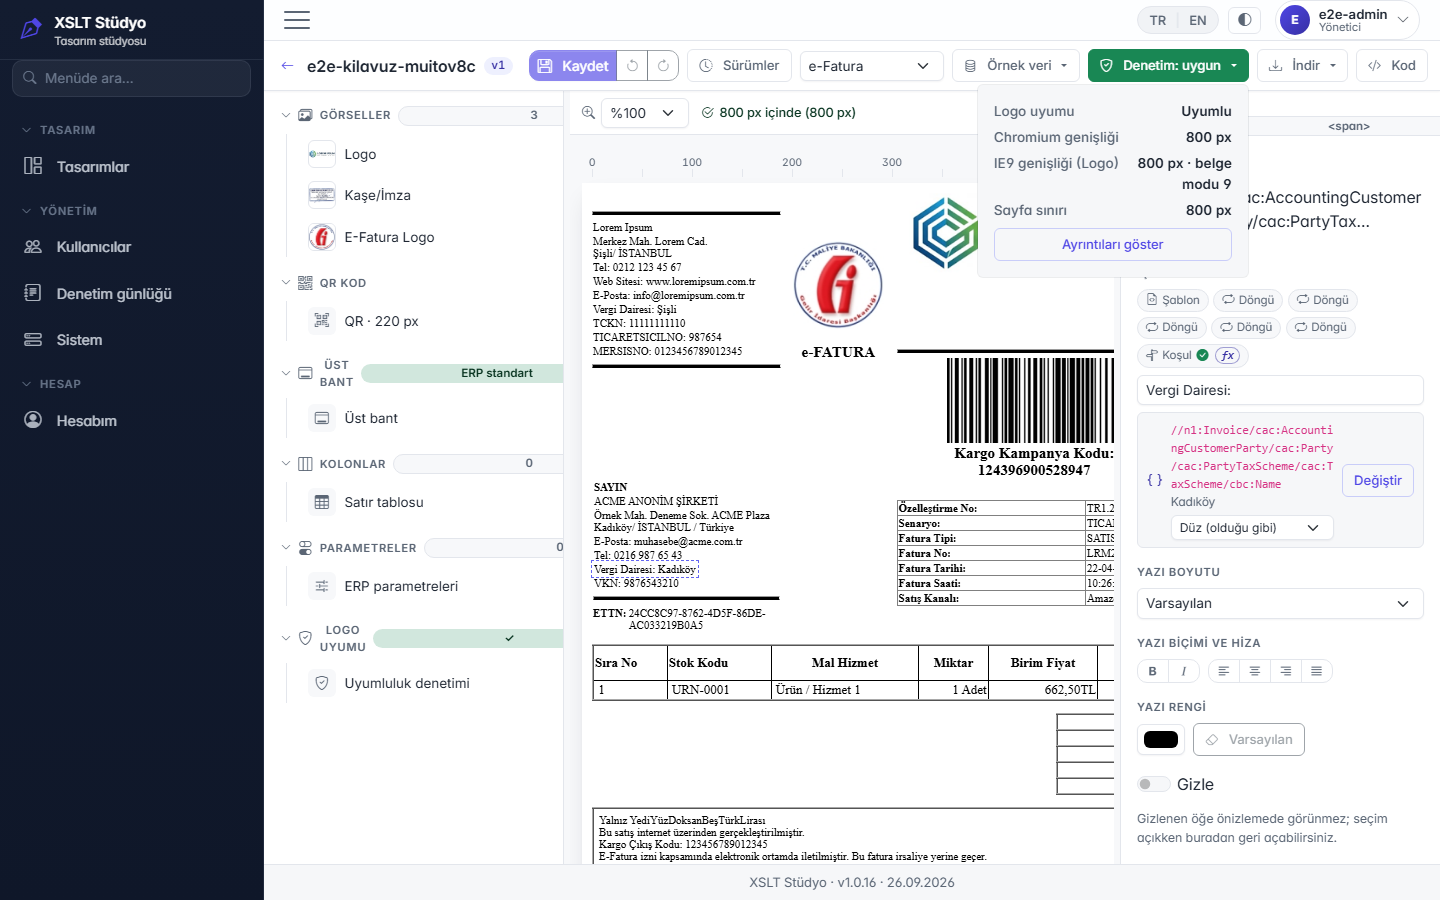
The badge summarises three checks: Logo compatibility, Chromium width and IE9 width (the legacy Internet Explorer engine used by Logo, document mode 9) — both against the 800 px page limit. If there is a problem the badge turns red; Show details lists the reasons.
10) Saving and versions
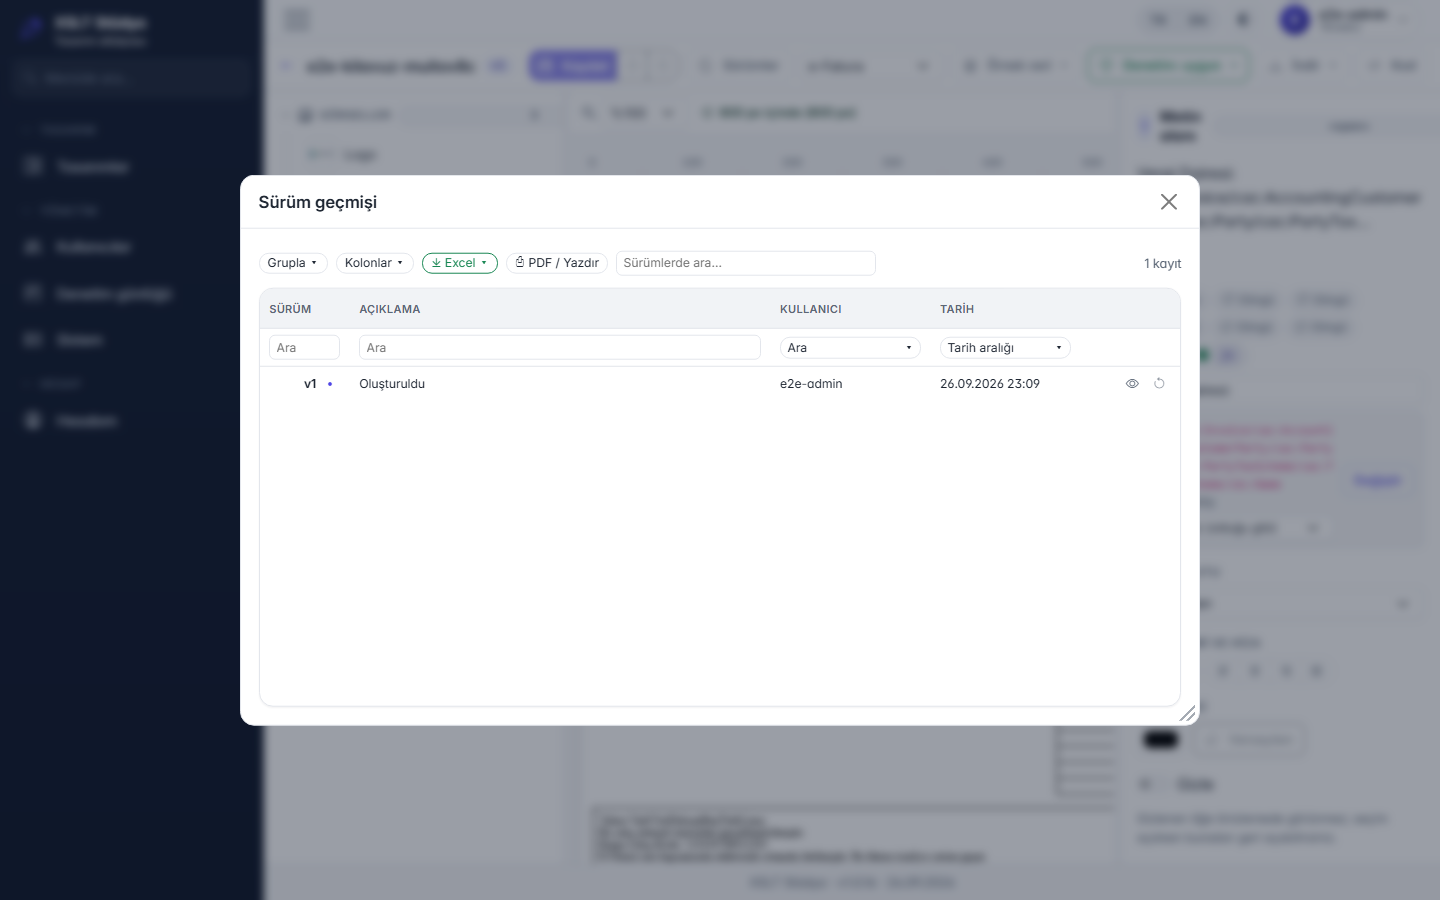
- Save asks for a description and creates a new version (v1 → v2 …). Versions are immutable.
- The Versions dialog lists all versions with description and author. Revert to version saves the old content as a new version; history is never deleted.
11) Preview data
Pick a ready-made sample invoice from the Sample data menu or upload your own UBL / UBL-ZIP file. The uploaded document is used only for the preview and is not stored (GDPR/KVKK).
12) Download
The Download menu downloads only a saved version (file name <Name>_v<N>.xslt). Besides XSLT, the UBL and
ZIP options are disabled if the design has no embedded attachment; uploading a signed UBL shows a warning that the
signature will be broken. If the licence is charged per download, each download is deducted from your allowance.
13) Code view
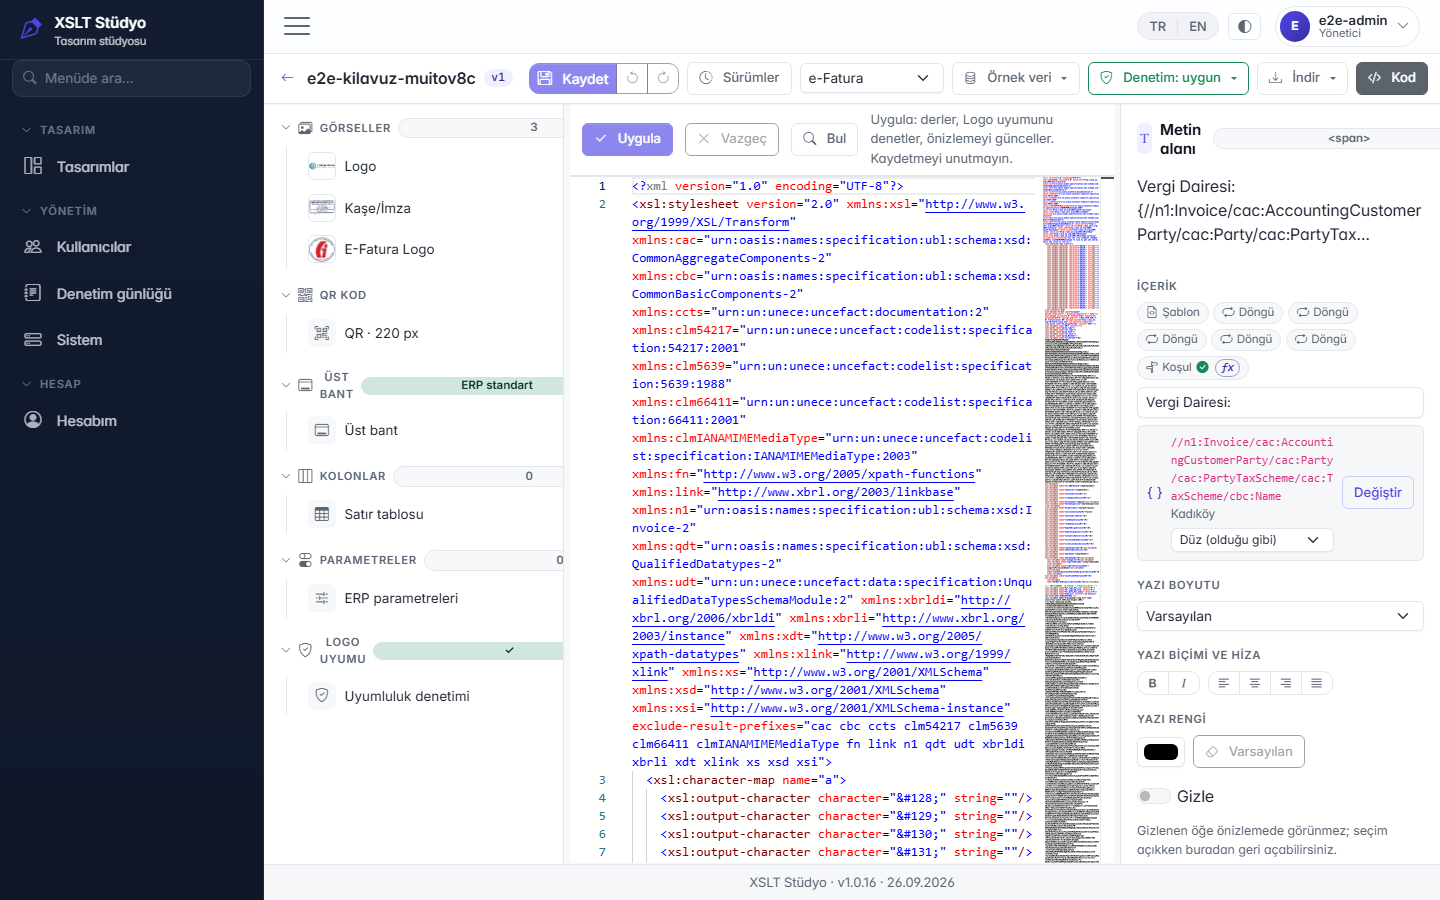
The Code button opens the XSLT in the Monaco editor. Apply compiles the code, checks Logo compatibility and refreshes the preview; use Save to save it. Discard throws the changes away.
14) Administration
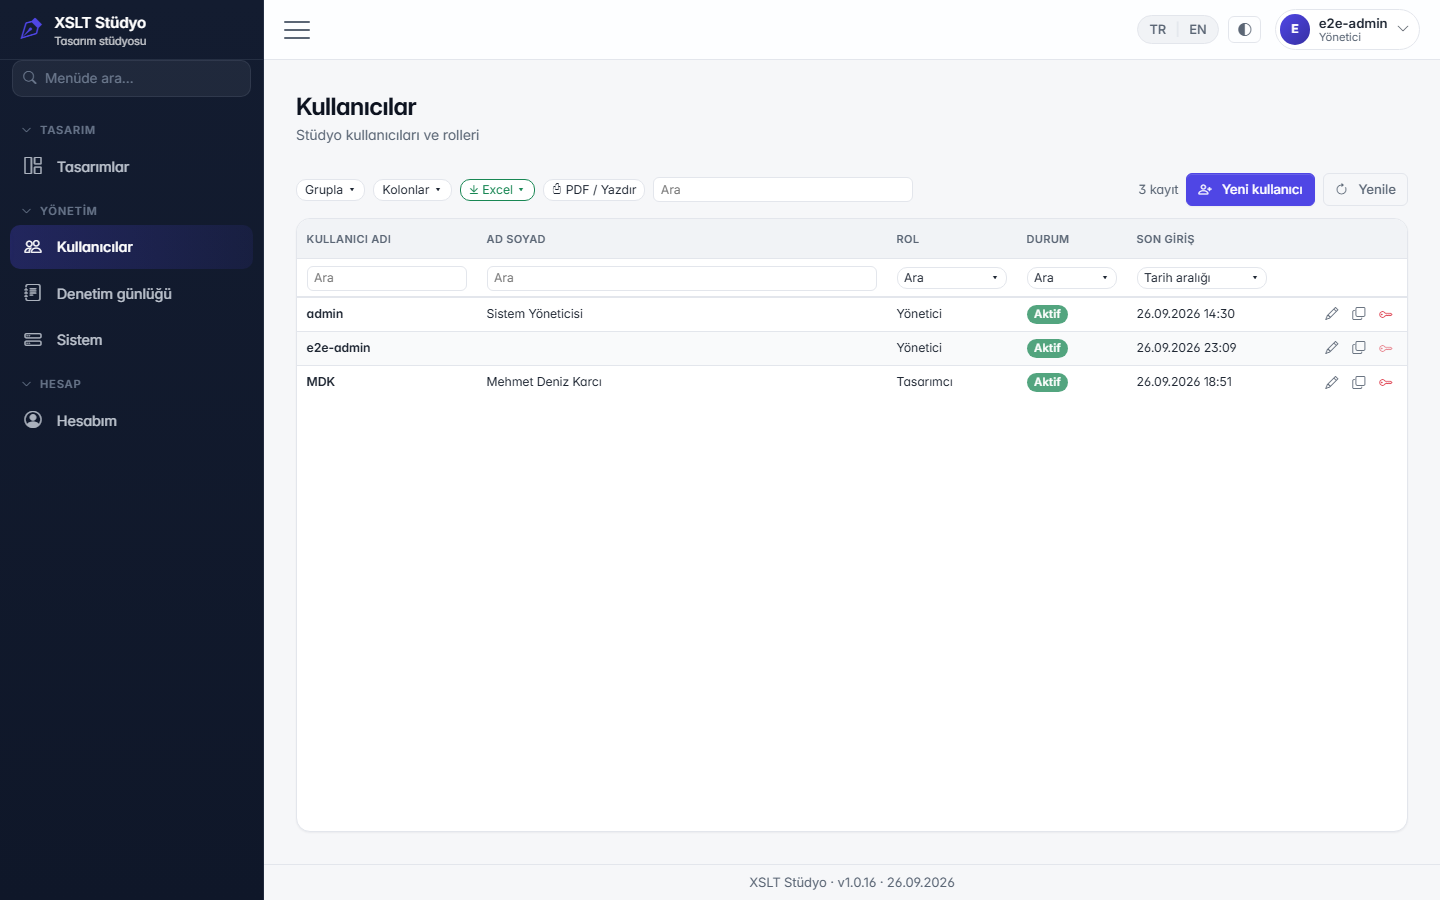
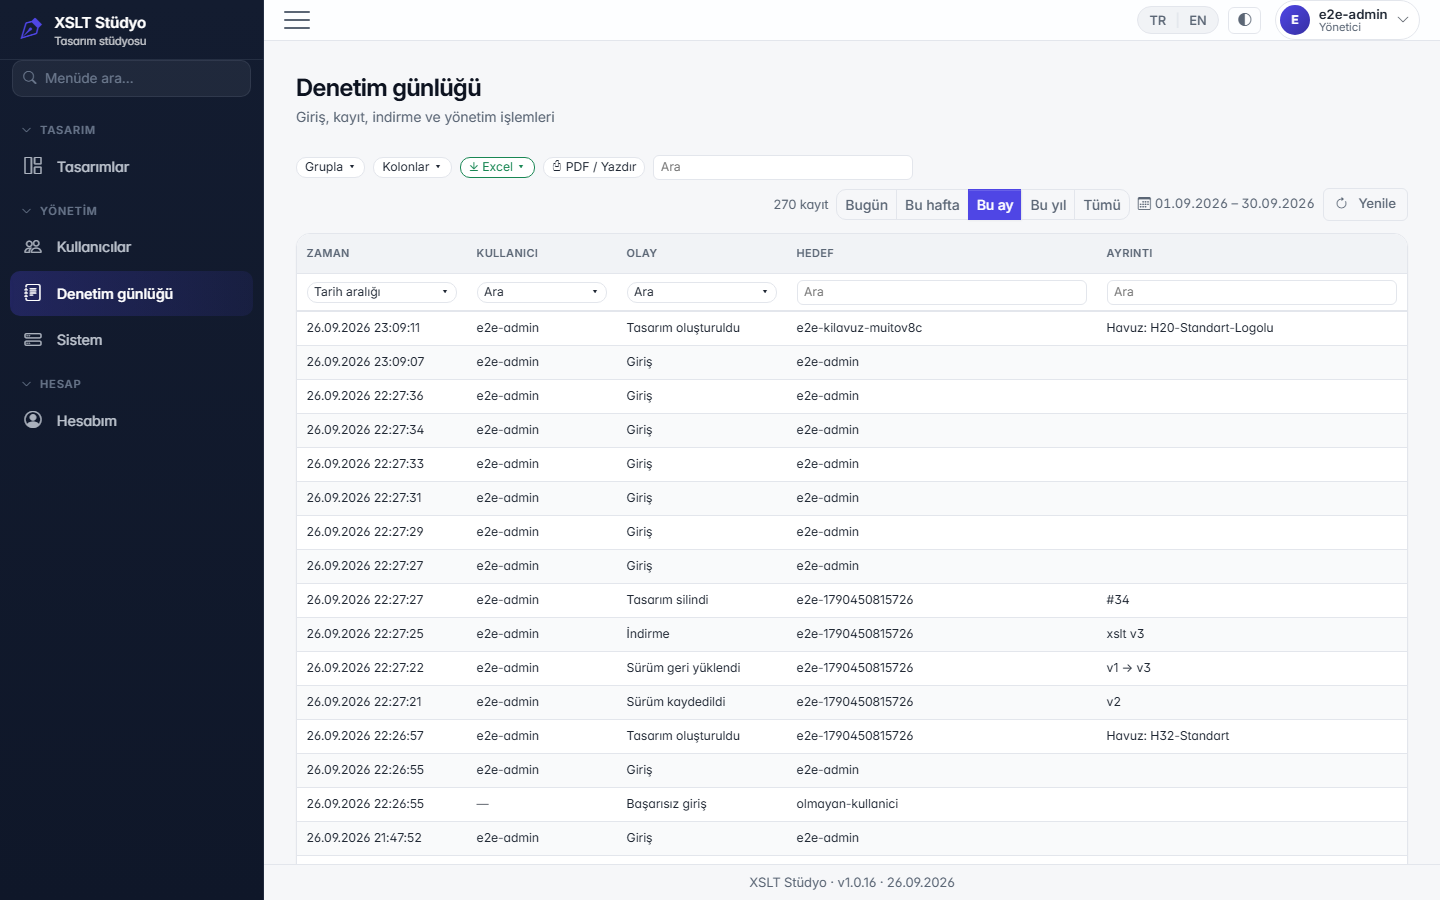
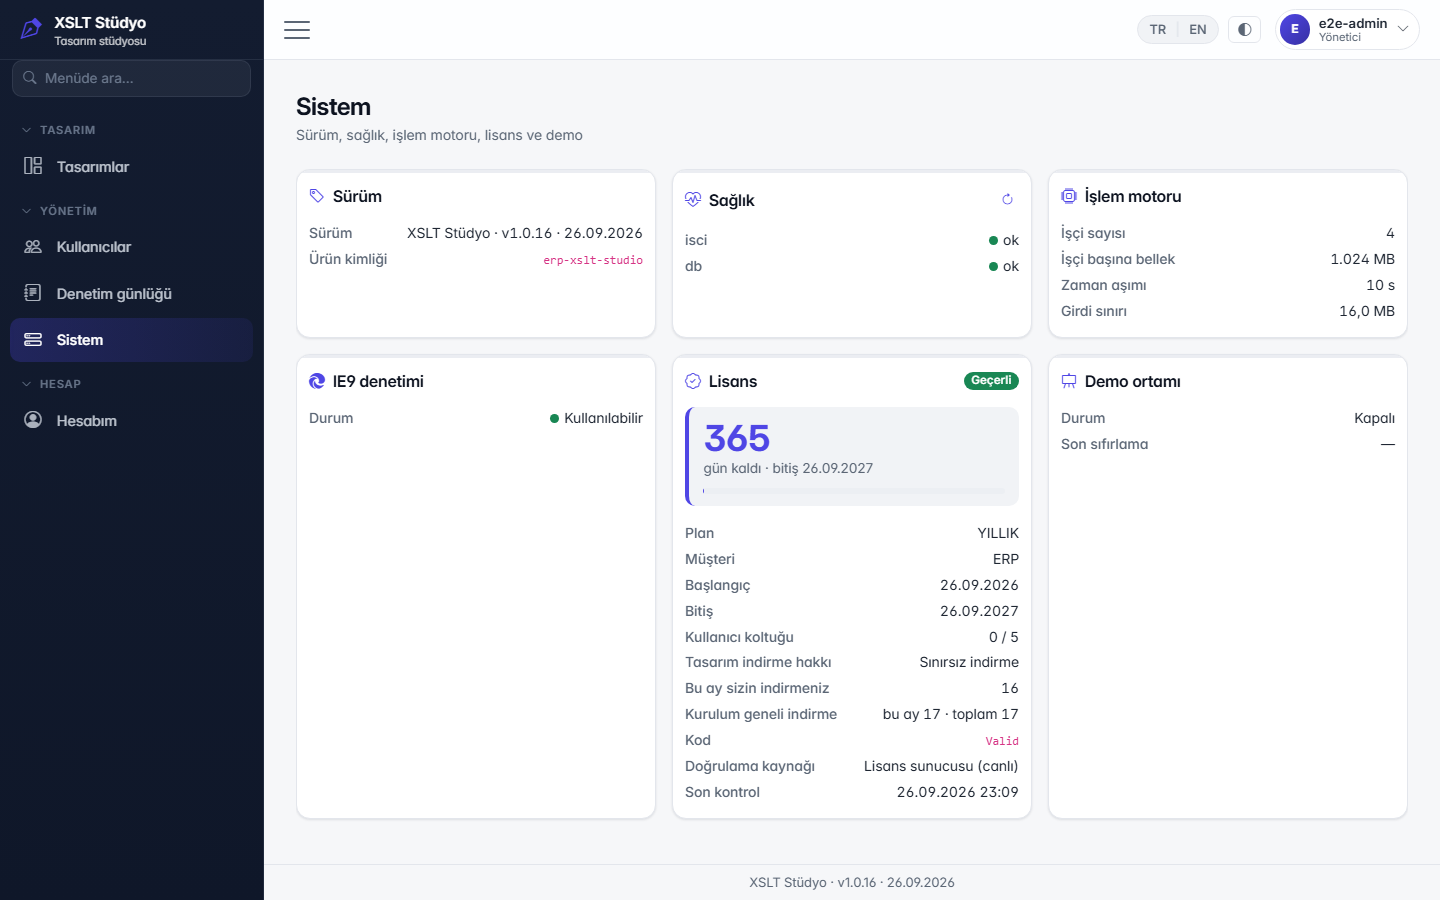
Visible to the Administrator role only.
- Users: add / edit / deactivate, role (Administrator · Designer), temporary password generation (the user changes it on first sign-in). Administrators cannot reset their own password here; they use My account instead.
- Audit log: sign-in, password, design and administration events; filtered with date range chips.
- System: version, health, XSLT engine, IE check worker, licence and demo cards. When demo is enabled a real administrator can rebuild the demo data with Reset demo.
15) My account and licence card
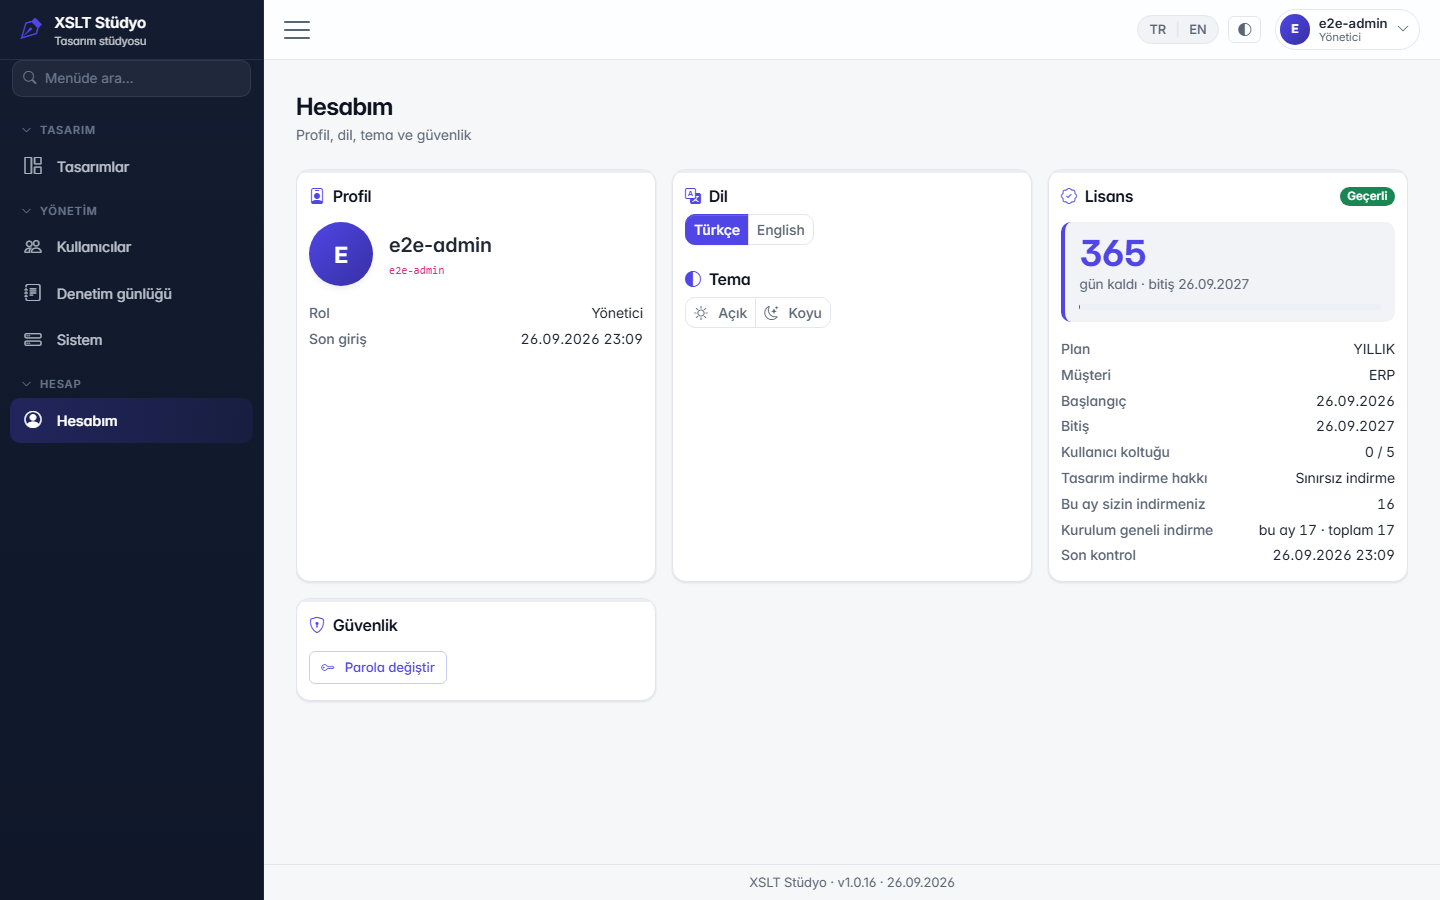
Language and theme preference, password change. The password must be at least 10 characters and contain letters and digits.
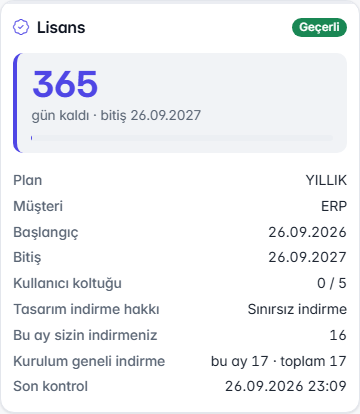
The Licence card shows the plan, customer, start/end dates and the days remaining; the badge turns to a warning when 30 days or fewer are left. User seats, the design download allowance (unlimited or remaining balance), your downloads this month and installation-wide downloads are shown here too.